LEARN MUSIC AND AUDIO PRODUCTION | Wavmonopoly TIPS AND TRICKS
Melodyne Ultimate Guide

wavmonopoly June 29, 2022

Anyone who has ever tried to sing knows that it’s not as easy as it sounds. In fact, for most people, singing is downright difficult. That’s because singing requires perfect pitch and the ability to control your voice perfectly. For most of us, that’s simply not possible.
Fortunately, there is a solution. Melodyne is a software application that can help you to sing in tune and on the pitch. It’s essentially a vocal coach in a box, and it’s been used by some of the world’s top singers. The best part is that it’s very easy to use, even if you’ve never used a vocal training program before.
In this guide, we’re going to show you how to use Melodyne so that you can start singing like a pro. We’ll cover everything from the basics of the software to more advanced techniques. By the end, you’ll be able to use Melodyne to get your voice into perfect shape.
What Is Melodyne?
Melodyne by Celemony is a software plugin that allows you to manipulate the pitch and timing of audio recordings. It’s used by top music producers and DJs all over the world, and it’s considered to be one of the best plugins for pitch correction and creative sound design.
This plugin is ideal for pitch correcting a vocal performance, or for creating unique sonic effects. The interface is very user-friendly, and the results can be quite impressive.
People call it “autotune,” and it does have automatic correcting features. But the best way to use Melodyne is to actually get in there and tweak the recordings manually. This gives you much more control over the sound, and the results can be truly stunning.
You may also modify the format. And, in the context of Melodyne, formant changes can make a typical female voice sound like a normal male voice or vice versa.
However, for the most part, it is used to tighten up the focal vocal’s tuning in a recording. The results are very natural sounding, which is one of the main reasons it’s become so popular.
Melodyne vs Auto-Tune: What’s The Difference?

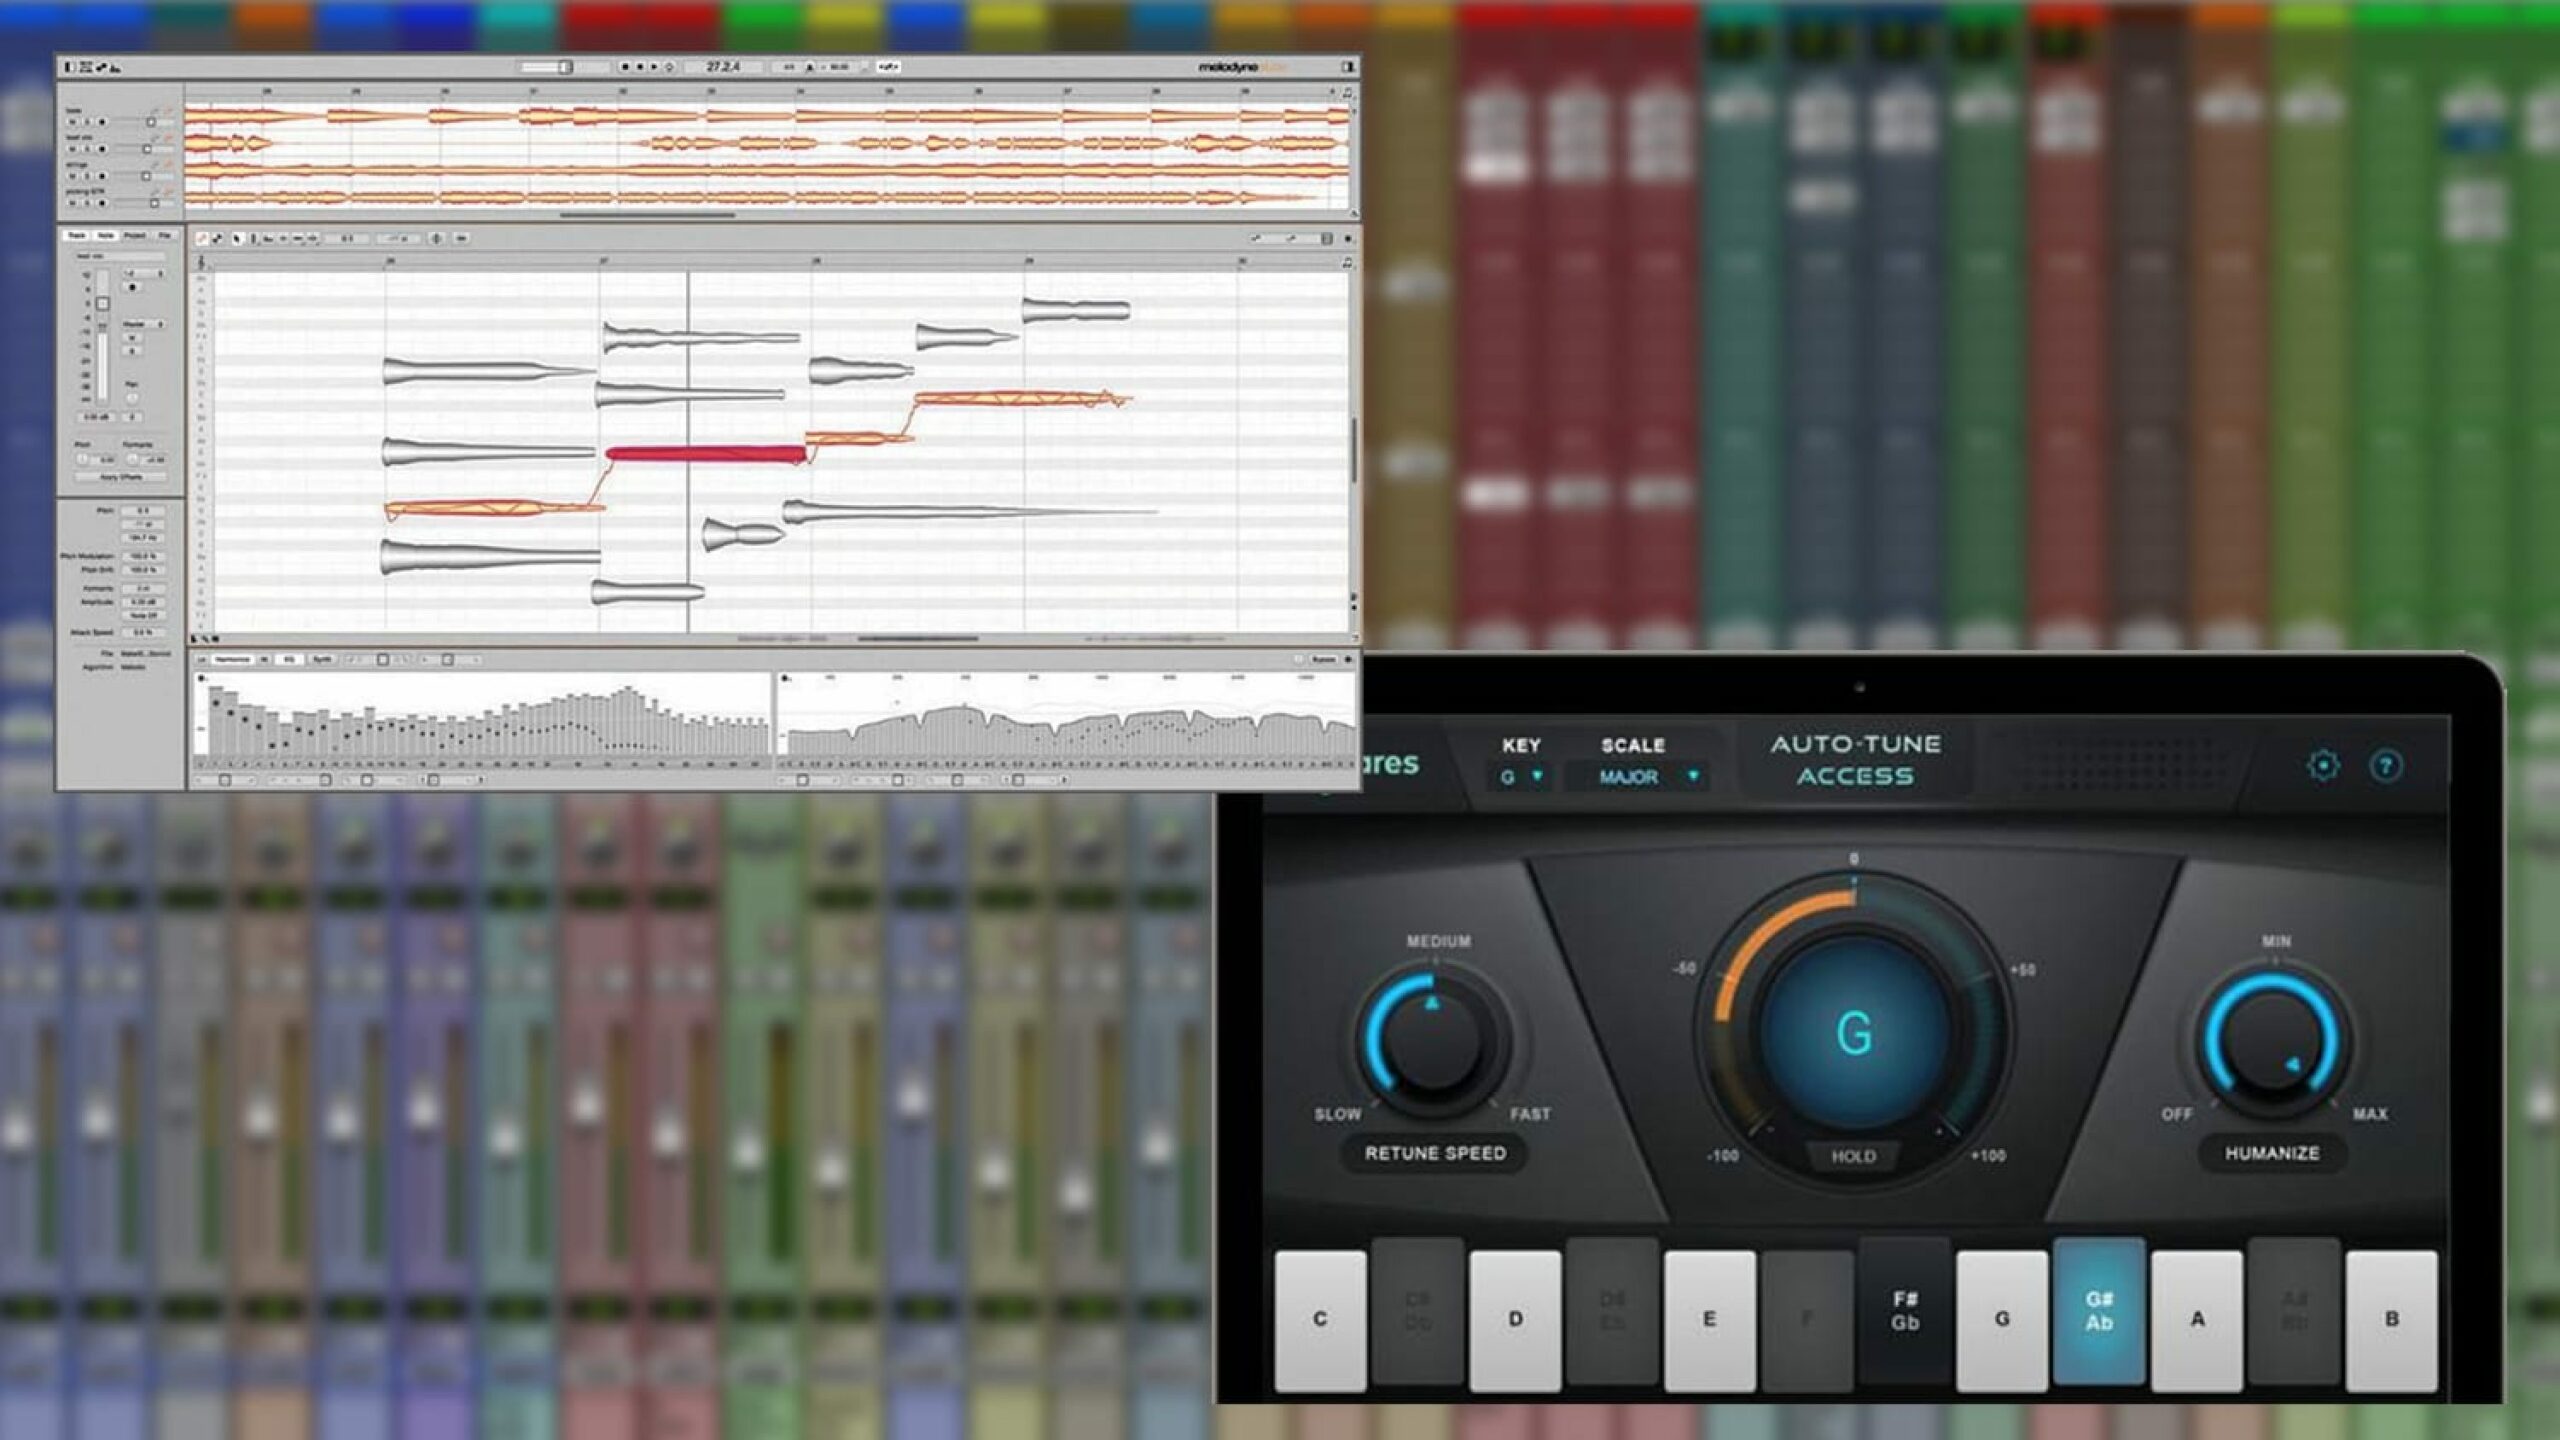
Auto-Tune is a pitch correction software that was developed by Antares Audio Technologies. It’s been around since 1997 and it’s become the industry standard for pitch correction.
Auto-Tune works by analyzing the pitch of the incoming audio signal and correcting it to match a target pitch. This can be used to fix minor tuning issues, or it can be used to create radical pitch effects.
Auto-Tune is great for fixing minor tuning issues, but if you want to get creative with your sound, Melodyne is the better choice. The extra features and the ability to work with audio files make Melodyne a more powerful tool.
Some of the key differences between Auto-Tune and Melodyne include:
1) Realtime vs Offline Tuning
One of the biggest differences between Auto-Tune and Melodyne is that Auto-Tune works in real-time, while Melodyne doesn’t. This means that you can’t use Melodyne to fix a performance while it’s being recorded.
The Auto-Tune effect is applied to voices as they’re recorded, resulting in earlier tuning with minimal latency. With this technique, vocals are immediately tuned after they’ve entered the plugin. This speed can make it easy to work quickly, but it can also introduce errors. Sometimes the plugin is not sure about a note and so the note might be tuned to the wrong place which makes the music sound even more off.
However, Melodyne records the audio in its program first. The user may then go through each note and manually correct any errors the software made. This is effective because it takes into account each of the different modes, but it does take some time to get right.
The upside to this is that Melodyne gives you much more control over the sound. You can go in and make detailed adjustments to the timing, pitch, and formants of a recording.
2) Polyphonic vs Monophonic
Another advantage of Melodyne that Auto-Tune does not include is the capacity to tune polyphonic instruments.
Almost every Auto-Tune studio version only supports monophonic signals, which limits its use to vocals and solo instruments. It is possible to use Auto-Tune on polyphonic signals, but the results are often poor.
On the other hand, Melodyne can be used on both monophonic and polyphonic signals. This means that you can use it on anything from a solo vocal performance to a full orchestra recording. This is a big advantage if you want to tune a whole recording at once.
3) Live Performances vs Studio Work
Auto-Tune is designed for live performance, while Melodyne is better suited for studio work.
This is because Auto-Tune works in real-time, while Melodyne doesn’t. As we mentioned before, this means that you can’t use Melodyne to fix a performance while it’s being recorded.
Auto-Tune, on the other hand, can be used in real-time, which means you can use it to fix a live performance while it’s happening.
So, if you’re a singer who wants to use pitch during live performances, Auto-Tune is the way to go. But if you’re a studio musician or producer who wants more control over the sound, Melodyne is a better choice.
4) Scientific vs Artistic
Melodyne can be seen as a more scientific approach to tuning music, while Auto-Tune is more about expressing oneself artistically. The advantage of Melodyne is that it can be used to achieve very natural-sounding results, as well as more extreme, creative effects.
On the other hand, Auto-Tune is better for creating distortions in the pitch of a voice on purpose. It is a great tool for making your vocals sound like they’re from a top pop, RNB, or hip-hop song. Melodyne can’t do that as well as Auto-Tune.
However, if you want to go for a more transparent technique, Melodyne is the way to go. When used correctly, the vocals will seem unaltered yet precisely in tune. The beauty of it is that the listener will not be able to tell that the software was used at all.
5) Ease of Use
Both Melodyne and Auto-Tune have a bit of a learning curve. They are both powerful tools that can do a lot, so there is some complexity involved in learning how to use them properly.
However, Auto-Tune is generally seen as the more user-friendly of the two. The interface is simpler and more straightforward, making it easier to get started with.
Melodyne, on the other hand, has a more complicated interface with more options and controls. It can be daunting for someone who is new to the software. However, once you learn how to use it, you will be able to achieve better results with it.
How To Use Melodyne
Melodyne is a powerful tool, but it can be difficult to use if you’re not familiar with it. In this section, we’ll go over some of the basics of how to use it.
1) Set Up The Singer & Producer For Success
The first step is to make sure that the singer and producer are on the same page. The singer should know what kind of performance the producer is looking for, and the producer should know what the singer is capable of.
It’s important to set realistic expectations from the start. If the producer is expecting a polished, studio-quality performance, the singer should know that they need to be able to sing in tune and on pitch. If the producer is looking for a raw, live sound, the singer should know that some imperfections are okay.
The key is communication. The producer and singer need to be able to talk openly about what they’re hoping to achieve.
2) Setting Up Melodyne
It’s time to start exporting assets using Melodyne once your vocal track is complete. The first thing you need to do is set up a Melodyne project.
Open Melodyne and click on the “File” menu. Then, click “New Project.”
A new window will open. In this window, you need to select the audio files that you want to import into Melodyne. To do this, click the “Import” button and select the files you want to use.
Once you have Melodyne opened on the track you want to pitch correct, there is a button in the top left corner with the word “transfer” on it.
To begin, click “transfer” and play the vocal track until it’s finished. You’ll see that the audio is now loaded in Melodyne and can be manipulated.
3) Determining The Key Of The Song
The next step is to figure out the key of the song. This will help you understand what notes the singer should be singing.
There are a few different ways to do this. You can use a piano, or you can hum the melody yourself. You can also use an online key finder tool.
Once you know the key of the song, you can start to figure out which notes the singer should be singing.
We also made this really easy with our Key Finder, so feel free to check this tool out to help you find the key and scale quickly and accurately.
4) Understanding Your Toolkit
Our main focus in this guide is going to be on using the “Pitch” tool. However, it’s important to understand all of the different tools that Melodyne has to offer.
- Main tool: If you click on a note and hold ALT while moving your mouse left or right, or up or down with the mouse, you’ll be able to use the timing tool by moving it left or right, and the pitch tool by moving it up or down.
- Pitching tool: This allows you to change the pitch of the sound. There are additional functions that you can access by left-clicking or right-clicking on the icon.
- Pitch modulation tool: The pitch will be flattened and centered with this device.
- Pitch drift tool: This tool will help keep your pitch centered so it doesn’t sound too flat.
- Format tool: This effect modifies the resonance of a voice without changing the pitch. When pitching up or down, the formants will also follow.
- Amplitude tool: This tool changes the volume of the voice. If you have already prepared the track, you don’t need it.
- Timing tool: The vocal timing may be changed using this tool. If the singer is out of time on occasion, it can be quite beneficial.
- Note separation tool: This tool divides the vocal section into separate pieces based on Melodyne’s note location. It will automatically split the notes for you; however, it may occasionally divide them incorrectly.
The Main Event: Pitch Correction
Now that you understand the basics of Melodyne, it’s time to start pitch correcting your vocals.
Step 1: Identify Floating Vocals
The first step is to identify which notes are off-pitch. To do this, you need to find the “floating” notes.
To find the floating notes, you need to listen to the track and look at the waveform. The notes that are off-pitch will stand out because they will be flat or sharp.
Also, search for sections of the vocals that fall on incorrect notes in the key signature. It will be easier to identify these notes if you know the key of the song.
Step 2: Grab The Main Tuning Tool
Once you have identified the notes that are off-pitch, it’s time to start correcting them. To do this, you need to grab the main tuning tool.
This is the tool that you will use to change the pitch of the notes. Left-click the note, then simultaneously click and hold ALT/CMD. The vocal clip should slide up and down.
Make sure the vocal portions are as close to the note’s center as possible.You can also use the arrow keys on your keyboard to make small adjustments to the pitch.
Step 3: Control The Separation
The next step is to control the separation of the notes. This is important because you don’t want the notes to sound too choppy.
To do this, you need to use the “Note Separation” tool. You can find this tool in the left-hand toolbar.
Click and drag the note separation tool across the vocal track. You’ll see the notes start to separate.
As you separate the notes, you’ll also see the pitch start to change. This is because Melodyne is trying to keep the individual notes in tune. You can use this tool to make the notes sound more natural.
Step 4: Pitch Drift
The next step is to use the “Pitch Drift” tool. This tool is used to keep the pitch centered so it doesn’t sound too flat.
To use the Pitch Drift tool, you need to click and hold ALT/CMD while moving the mouse up or down. You’ll see the pitch start to change.
The notes are mostly in-tune at this point, depending on your pitch correcting goal, and you may stop here.
Step 5: Pitch Modulation
The pitch modulation tool can have a greater impact on the vocals than other tools, so avoid overusing it.
When altering your correct pitch, keep in mind that part of the process is to leave some flaws intact so that the voice sounds natural rather than robotics or synthesized. If you use this tool correctly, and depending on the singer’s skill level, you will be able to achieve nearly perfect tuning without it sounding too artificial.
The previous tool is similar to this one. Simply click, hold, and drag until the red lines approach the middle of the note.
How Much Does Melodyne Cost?
There are three versions of Melodyne to choose from: Melodyne Essential, Assistant, and Editor.
The Melodyne Essential is the most basic and inexpensive choice, costing around $100. The basic features for pitch and timing are all you need to do simple vocal correction.
Melodyne Assistant includes a few more features for about $250. You have control over pitch, rhythm, vibrato, phrasing, formants, and dynamics.
Finally, Melodyne Editor is a highly professional autotuning software that costs around $400. Editor may be used to process vocals in addition to other instruments. It may also be used to convert any sample sound into a song’s chords.
What Are The Minimum System Requirements For Melodyne?
All versions are available for both Windows and Mac. The Windows version will function on a dual-core Intel or AMD processor with at least 4 GB of RAM. It requires Windows 7, 8.1, or 10 and is compatible with 32-bit and 64-bit architecture.
The Mac version of the software runs on an Intel Dual Core processor, and you need 4 GB of RAM to use it. You also need macOS 10.6.8 through 10.15 to be able to use it.
All versions of the software will work as a standalone application or as a plugin in your favourite digital audio workstation. The plugin versions require an AU, VST 2.4, or AAX host.
Is Melodyne Worth It?
Yes, Melodyne is definitely worth the investment, especially if you are serious about music production. The software is easy to use and very versatile.
It can be used for a variety of tasks such as pitch correction, formant manipulation, and tempo changes. There are different versions of the product that offer different features. You can choose the one that best suits your needs.
If you are just starting out, then Melodyne Essential may be all you need. But if you want more control over your vocal tracks, then Melodyne Assistant or Editor would be a better choice.
We hope this guide has helped you to understand how to use Melodyne. If you have any questions, please feel free to leave a comment below. Thanks for reading!
