LEARN MUSIC AND AUDIO PRODUCTION | Wavmonopoly TIPS AND TRICKS
What is Reverb? The Ultimate Guide
wavmonopoly May 29, 2022
What is reverb?
What is reverb? Well, quite frankly reverb is everything around us. It happens to be the natural interaction of sound waves hitting every surface around. Whether it be a hard, soft, short, or tall; reverb hits it all.
Reverb gives us a sense of space. Which whether we notice it or not, the effect of reverb is happening at every given moment. It’s just how we hear sound. And without that perception of space sound would be very dull, boring, and unnatural.
Although that may be the case with everyday life, in the studio environment 9 times out of 10 the goal is to get the driest sound possible. This means we are trying to create an environment that can eliminate the natural external acoustic reverberation as possible. We do this in order to get the purest and unaltered sound as possible.
The reason for this is that when preparing a mix. We want to have as much control over as many variables as possible. So its rule of thumb is that having a cleaner mix will lead to the best possible mix which will trickle to the best possible master as we can achieve.
But a clean mix doesn’t necessarily mean a finished mix. See, because we naturally hear space and depth in everyday life wouldn’t it make sense for it to be used in your music.
You guessed it, yes reverb comes quite in handy when adding space to our mix. Once we’ve cleaned, balanced, and arranged our track.
That’s when reverb makes its way into our mixes.
What is the definition of reverb?
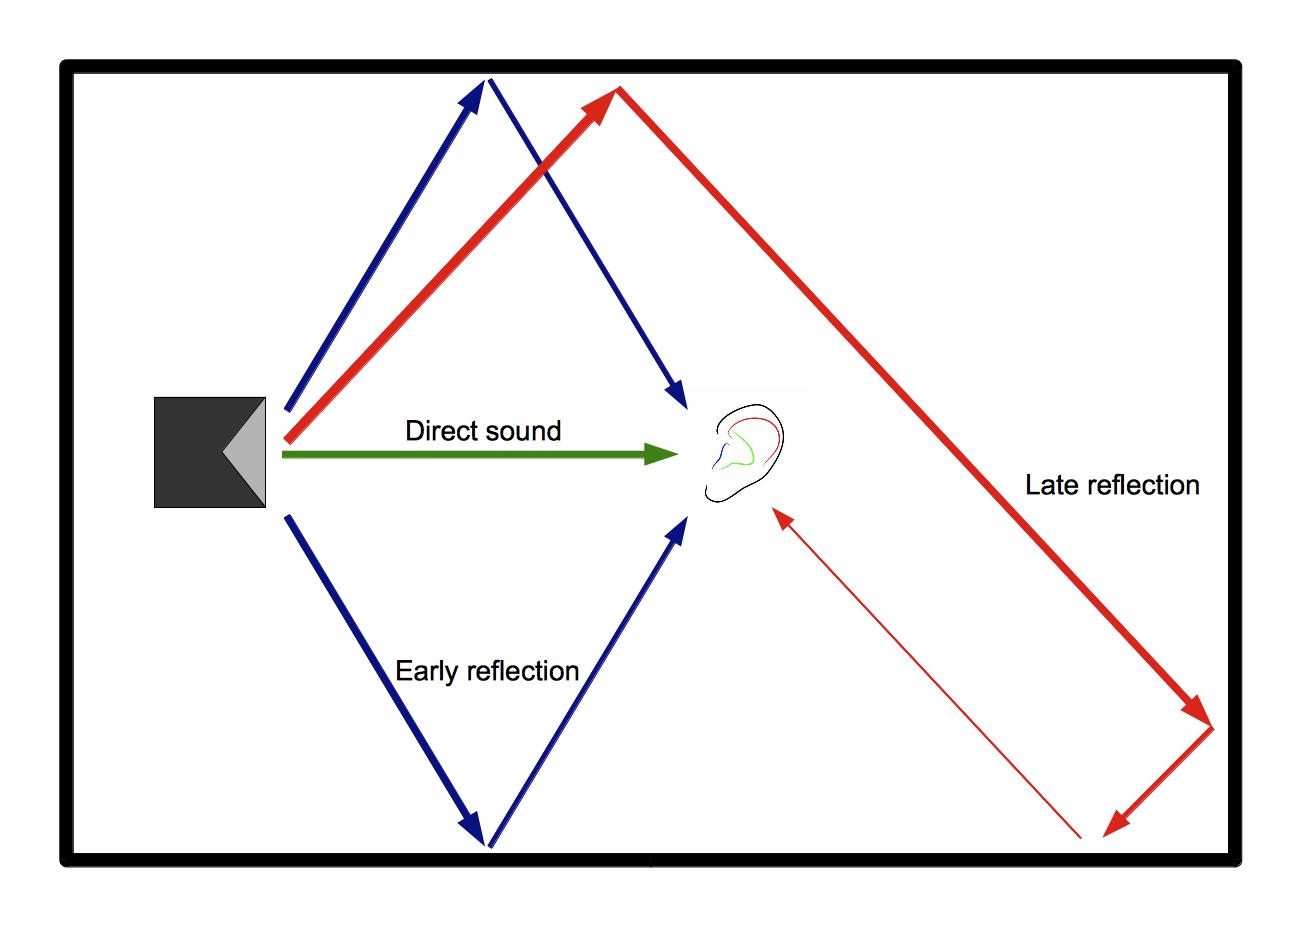
Reverb is created when a sound or signal is reflected causing numerous reflections to build up and then decay as the sound is absorbed by the surfaces of objects in the space. These reflections of sound waves we hear are what we call reverb.
What does reverb do in music?
To be honest, it can do many things but since we are in a controlled studio environment, allow me to tell you what reverb can do for you.
Reverb allows you to add space and depth to your mix. By doing this, it allows the listener a reference of perception of where sound is taking place and where the listener is in relation to it.
It can teleport you into a concert hall, then the next second put you in the cave, cathedral, or an intimate concert performance space such as a coffee shop.
All in all, it can give you natural harmonics of your sound source to shine thru and sit in a space in your mix to glue together effortlessly.
Digital Reverb Types
Now, in modern-day music we find ourselves working mainly in the box or other words creating music without external hardware. This is where digital reverb shines the most. Since we are now working in the technology age, it is way more convenient to use digital reverbs than run to place our sound source in a cathedral hall to achieve our desired reverb space and effect. That is where digital reverbs come in, more than likely you have come across two different types which are Algorithmic and convolutions reverbs. Let’s take a closer look at both to grasp the full understanding of each.
Algorithmic reverb
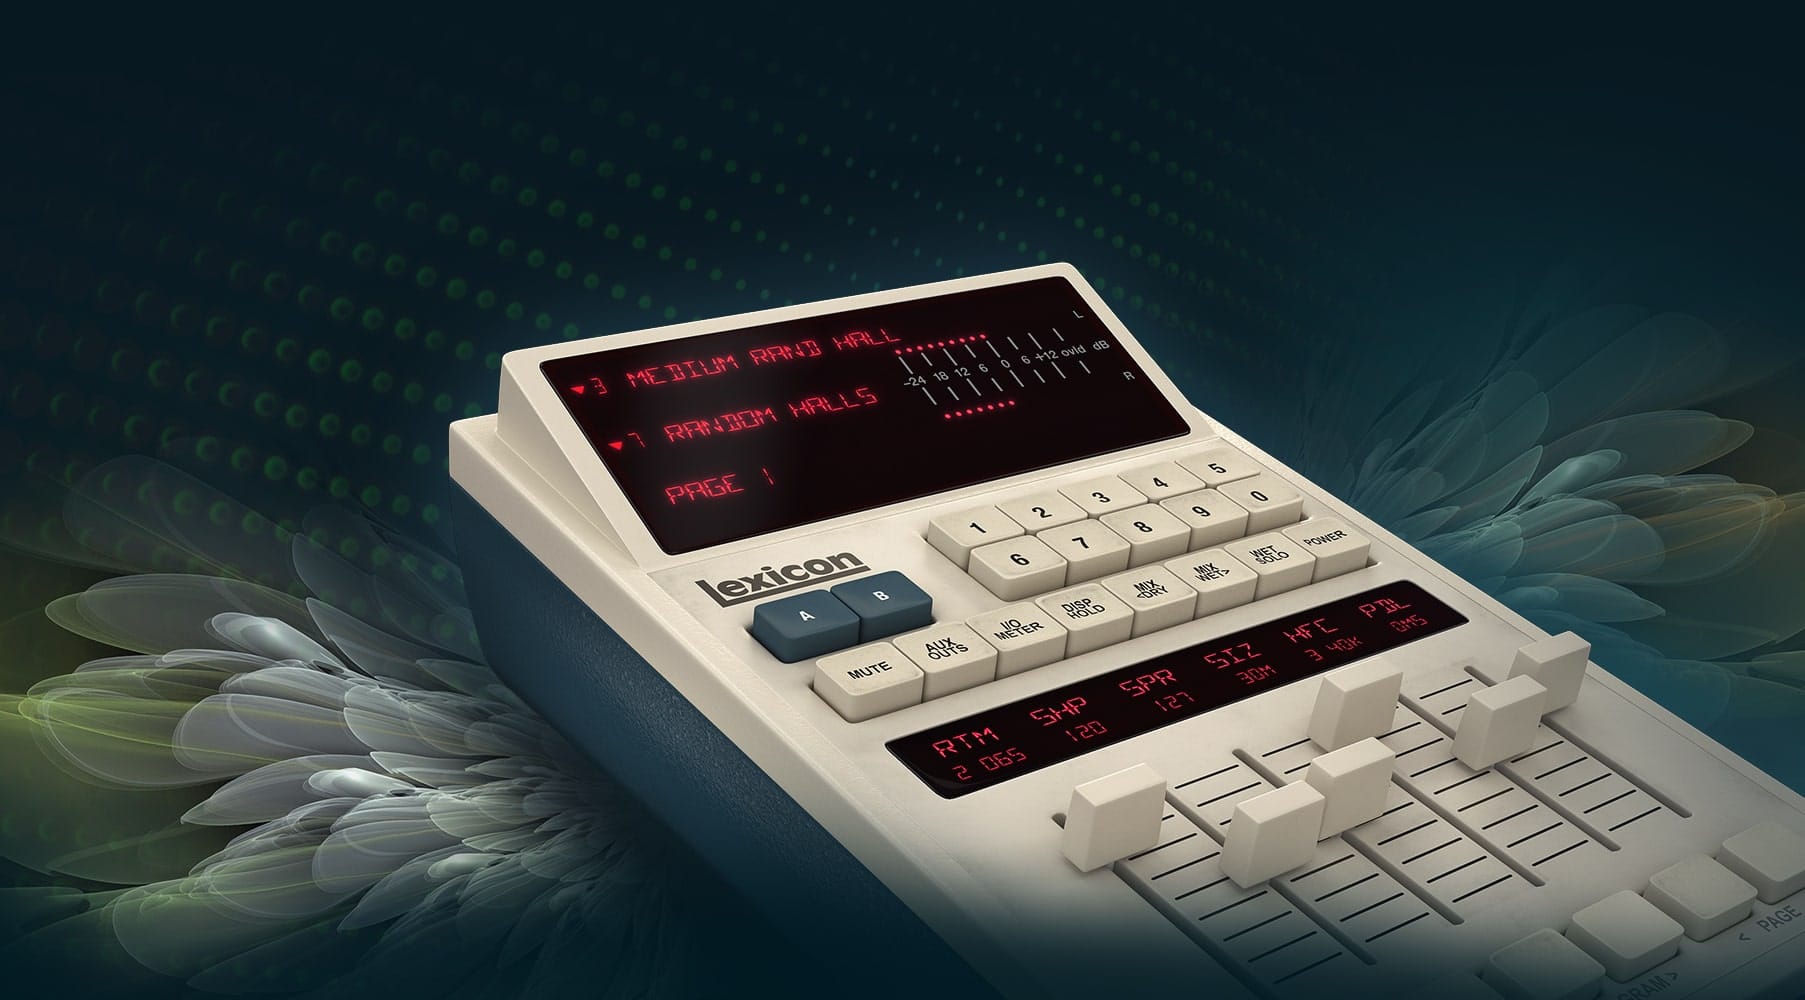
As the name says, this type of reverb is created by using an Algorithm which means it’s created by a series of mathematic calculations. By creating these complex calculations audio software engineers can replicate the reflections of real spaces. Examples of algorithmic reverbs include the Lexicon Reverbs, FabFilter Reverbs, Isotope’s Neo Reverb and so much more.
Convolution reverb
Convolution reverb is a reverb type that is created from an impulse response. This means it takes audio samples from real spaces and captures them into the digital realm, then processes those files within the same software to create a very realistic sounding Reverberation effect.
A great example of a Convolution Reverb is the Waves IR Reverb.
When using Convolution reverb in your mixes it is important to capture the right impulse response for the space you are trying to create.
For example, if you’re wanting to add a Reverb effect to a vocal track and want that vocal to sound like it was recorded in a hall or large room. You would need to capture an impulse response of a large hall or room, process it inside your DAW and there you have it, you have your desired effect using convolution reverbs!
Different types of Reverb sounds?
There are many different reverb sounds in music production such as hall reverb, room reverb, chamber reverb, plate reverb, spring reverbs, and many more. But to keep this concise and straight to the point, we will focus on those.
Hall Reverb
Hall reverb give you a natural sound that is created in large enclosed spaces such as cathedrals, churches, or other auditoriums. This could come in handy when working with Classical, Pop, Jazz, or any other type of traditional music.
Chamber reverb
Chamber Reverb is very similar to hall reverb but it is typically used in smaller spaces like echos chambers. Echo chambers are typically used by singers to help them create the sound of their voice echoing. This type of reverb is also common in Drum Reverbs.
Room Reverb
Room Reverb is the most common type. It is a simulated natural reverb that gives you the sound of your music being played in mid to large size rooms. Using this reverb will give you the clarity to your mix and can make it sound more realistic.
Plate Reverb
Plate reverb is a reverb sound that is used to replicate the sound of an analog plate reverb. This reverb effect works very well on vocals because of its main characteristics of having a short reverb tail and reverb time it allows for crystal clear clarity.
Spring Reverb
Spring reverb is a reverb that is created by using an analog spring reverb device. These spring reverbs have a very unique and distinct sound that is often used on guitars, drums, and other percussion instruments.
How and when should you use reverb?
I remember early in my days of music production reverb was a hard concept to grasp at first. Knowing when and how to use reverb, which reverb plug-ins to use, and making sure not to use too much reverb was a mystery. So I would like to take this time to go ahead and explain where to consider using reverb in music production.
Tips to ease reverb use in your workflow?
Using reverb isn’t just an effect but you are bringing another signal as well as more introducing other frequencies into your entire mix. With that being said, engineers have found it interestingly efficient was to control the reverb effects and how much reverb we add into our mixes.
The industry-standard way of using reverb in music production is to use return/auxiliary channels to add reverb. Some also call this a reverb bus. The main reason we use the aux channel is that by doing so we have control of the dry/wet balance. Thus keeping the wet and dry separate, which allows us to affect our direct sound by adding our wet reverb signal independently to it.
Now since you’ve made it this far, you might remember me saying that adding reverb will also introduce reverb frequencies as well. So like any other mix component, you are going to want to EQ your reverb as well. In most cases rolling off anything under 200 Hz and everything above 8 kHz will do the trick. We do this because many times the frequencies reverb creates can muddy up the lows and bring too much energy to the highs which can make vocals and other instruments hard to cut thru the mix.
Reverb on vocals
When it comes to adding reverb to vocals it mainly depends on the vocal sound you are going for. Let’s just say you are going for a Post Malone “Circles” type of reverb. Then you would be going for a more washed-out reverb with a longer reverb tail. As opposed to a Drake rap type of vocal reverb, then you would need a short room with a short reverb tail. Now it gets deeper than even that when we start thinking about the stereo image, reverb plugin, and all the other reverb parameters that all play a very important part in creating reverb.
But regardless of what reverb sound you are using, it’s important to use EQ to prevent the clashing of different frequencies, and to use an auxiliary channel so you can adjust the wet and dry signals of the reverb.
Techniques and reverb effects
Each technique will have a different effect on the sound. So, it’s important to know which one to use and when. Vocal reverb isn’t only an effect to be heard after the vocal but sometimes we can use the same reverb to create an interestedly pleasing effect by placing the reverb in front in which we can reverse reverb. Let’s explain it more.
Reverse Reverb
Reverse reverb is used on vocals or any other instrument to create an interesting effect. The idea behind the reverse reverb technique works by using reverb and reversing it so we can have our original sound with a reverse reverb tail.
Reverb Throws
A reverb throw is a fancy word for an effect that adds a reverb with a long tail to a specific word or phrase so its plays after the sound. To do this you can use sends or auxiliary channels to automate it with your favorite reverb settings so it only affects the vocal for a moment.
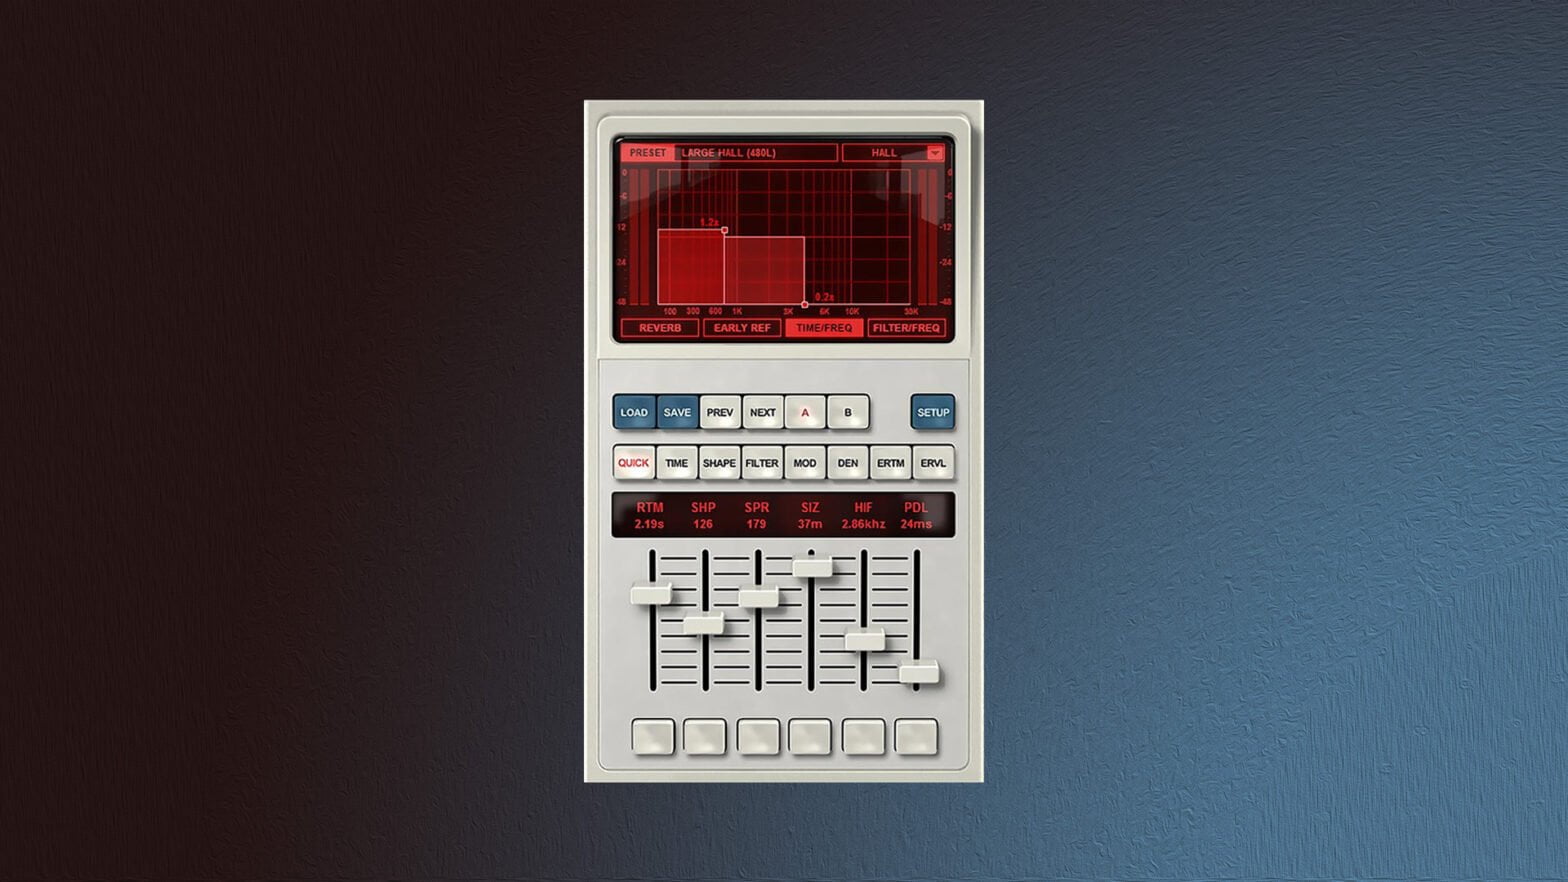
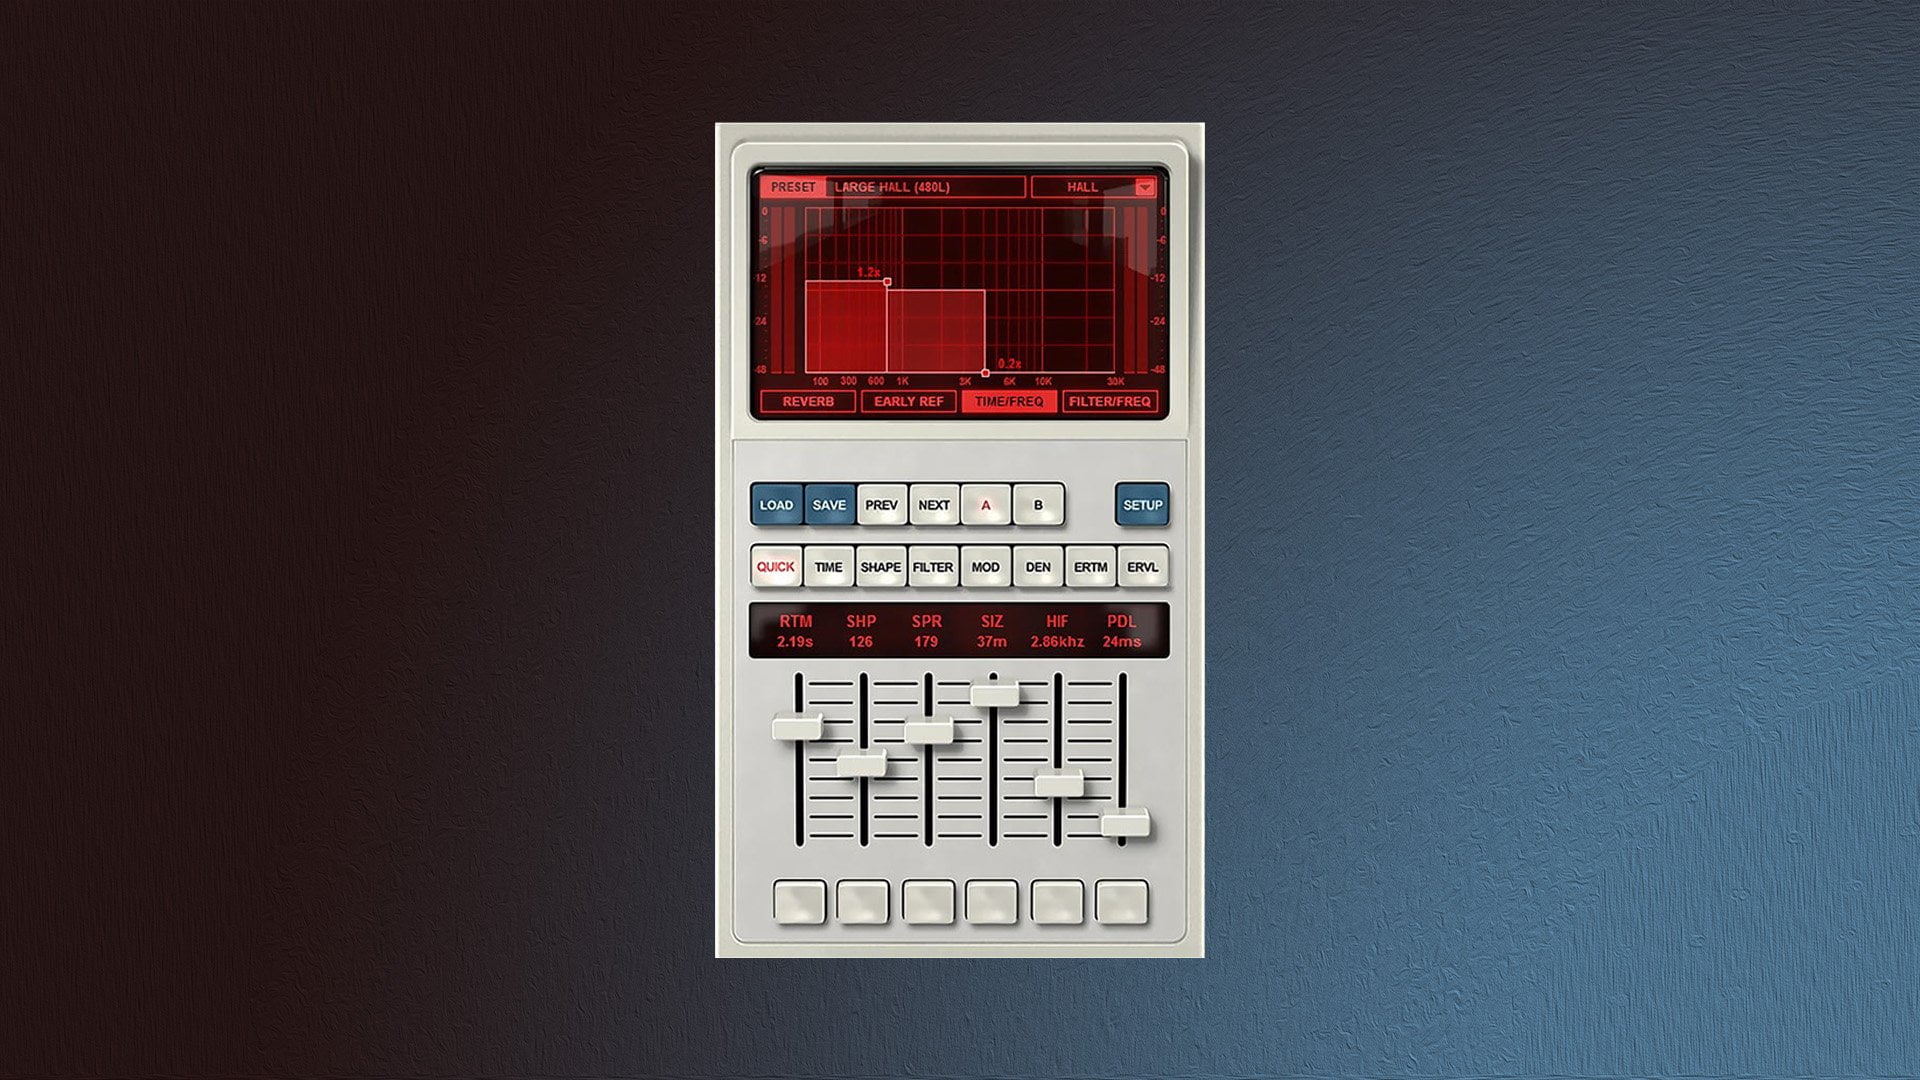
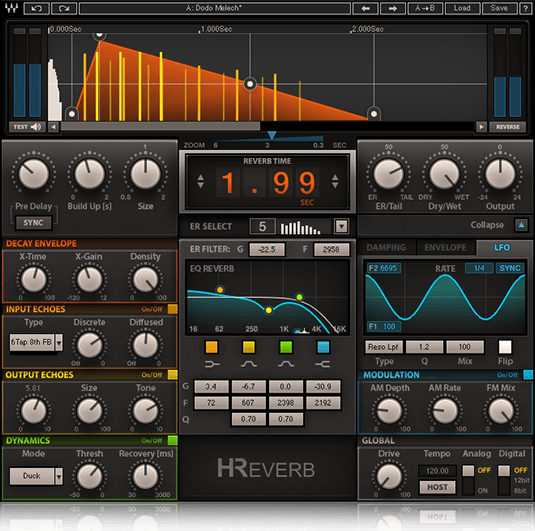
Reverb controls and parameters
Now that you know all about reverb, there are a few things you should know about the controls and parameters. These parameters can have a big effect on the reverb sound, so it’s important to understand what they do.
Pre-delay
Pre-delay is the time it takes for the reverb to start after a sound is played for the reverb sound to begin. Basically, the time difference in time from the direct sound and the early reflections to take place. Pre-delay can also give move clarity to vocals, or make a reverb sound more full.
How to find the right pre-delay time for reverb?
There is no one definitive answer to this question, always use your ears. But It depends on the reverb type you’re using, the sound you’re trying to achieve, and the track itself. A great starting place for finding pre-delay is to understand how it is calculated.
For example, if you have a reverb with a pre-delay of 100 ms and the reverb time is set to 500 ms, then the total reverb time will be 600 ms. This leaves 400 ms for the decay time. So depending on what you’re trying to achieve, you may want to adjust the pre-delay accordingly.
But to make this all easy and quick for you, we have made a pre-delay reverb calculator for you so you can find the exact reverb times to sit in your mix perfectly.
Decay Time
Decay time is the time it takes for a reverb signal to decrease by 60 dB. This is also known as the length of the reverb tail. The decay time will affect how wet or full the reverb sound will be, and how long it will last. You can experiment with different decay times to find what works best for your mix.
Diffusion
Diffusion in reverb is the measure of how much the reverb signal spreads out over time. A diffusion setting of 100% will sound very natural, while a diffusion of 0% will give you a tighter reverb sound. A reverb with high diffusion will build quickly and be very close, while a reverb with low diffusion will take more time to reach its full strength and may not seem like it’s right next to you.
Dry Wet Balance
The wet dry balance parameter allows you to control the mix of the reverb signal and the direct sound. This is a great way to find the perfect balance between your reverb and original track. With wet dry balance set to 100%, only reverb will be heard, while with wet dry balance at 0%, only the original track will be heard. In most cases, you would use a vocal reverb bus to control this parameter.
How to use reverb like a pro using these steps
Set your reverb room size
Setting the reverb room size will determine the size of the virtual room. A larger room will give you a more spacious reverb, while a smaller room will sound more like an echo or cavern. There are many different types to choose from, each with its unique sound. This can also affect the stereo image of your reverb, so make sure to test out different types and see what works for you.
Set the decay time
Decay is arguably the most important part of any particular reverb sound. The decay time is the time it takes for the reverb to become silent from the start time. Avoid setting the decay time too long because that is the main cause of muddy reverb in music.
Set your pre-delay
Setting the pre-delay is important because it determines how soon the early reflections will start. This can be used to help vocals sit in a mix or to make an instrument sound like it’s either closer or further away. The early reflections are the first point of contact the listener will hear with the reverb and this plays a big role in how it sounds.
Set your diffusion level
One of the most overlooked parameters in any reverb plugin is diffusion. Diffusion is the amount of reverb signal spreading out over time. Higher diffusion makes a more natural-sounding reverb, while low diffusion gives you a tighter sound.
Set your mix level
Setting your mix level will be determined by the track you’re working with and what it calls for. But a rule of thumb is to set your reverb volume at 0 dB. Then slowly lower the mix level until it sits on the track perfectly. Try to find that perfect balance between your dry and wet signals.
Conclusion
Now that you know the basics of reverb, it’s time to start experimenting with different settings and see what works best for your mix. With a little practice, you’ll be able to create lush reverbs that sound great on any track. Just remember to trust your ears. Now make those hits!